Table of Contents
- Step 2: Installing and Configuring SQL Server for SCCM 2012 R2 SP1
- Step 3: Installing and Configuring the Windows Server for SCCM 2012 R2 SP1
- Step 4: Installing and Configuring the SCCM 2012 R2 SP1 Site Server
- Step 5: Migrating Existing SCCM Data to the New SCCM 2012 R2 SP1 Site
This guide provides a step-by-step guide to upgrading System Center Configuration Manager (SCCM) 2012 R2 SP
1. It is intended for IT professionals who are responsible for upgrading their organization’s SCCM environment. The guide covers planning and preparation, installation and configuration, and post-upgrade tasks. It also includes a checklist of tasks to help ensure a successful upgrade. By the end of the guide, you should be able to successfully upgrade your SCCM environment.
Step 1: Preparing for the Upgrade Process
Prior to commencing the upgrade process, it is important to take the necessary precautions to ensure a smooth transition. This includes backing up all of your important data and documents, and verifying that your computer meets the system requirements for the new version of the software. Additionally, it is advisable to ensure that your anti-virus and firewall programs are up to date, as well as any other necessary security protocol. Finally, it is important to thoroughly read all the release notes and instructions to ensure that you are aware of any potential issues, as well as any specific steps necessary to complete the upgrade. By following these steps, you can ensure that the upgrade process is successful.
Step 2: Installing and Configuring SQL Server for SCCM 2012 R2 SP1
Before you can install SCCM 2012 R2 SP1, you must first install and configure SQL Server. This guide will walk you through the necessary steps to successfully install and configure SQL Server for SCCM 2012 R2 SP
1.
2. Install SQL Server
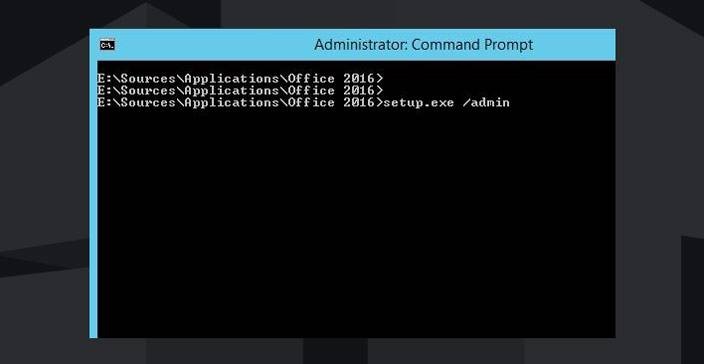
First, you will need to install SQL Server on the server where you plan to install SCCM. To do this, insert your SQL Server installation media and run the setup.exe file. Follow the installation wizard to complete the setup.
3. Configure SQL Server
Once you have installed SQL Server, you will need to configure it so that it is ready for use with SCCM. To do this, open the SQL Server Configuration Manager and configure the following settings:
• Enable the “Named Pipes” protocol.
• Enable the “TCP/IP” protocol.
• Set the default port to “1433”.
• Set the “Allow remote connections” setting to “Yes”.
• Set the “SQL Server Browser” service to “Automatic”.
• Set the “SQL Server Agent” service to “Automatic”.
4. Create a SQL Server Login
The next step is to create a SQL Server login that will be used by SCCM. To do this, open the SQL Server Management Studio and create a new login. Give the login a username and password, and then assign it the “sysadmin” role.
Once you have completed these steps, SQL Server will be ready for use with SCCM 2012 R2 SP
5. Make sure to save your settings and exit the SQL Server Configuration Manager before proceeding to the next step.
Step 3: Installing and Configuring the Windows Server for SCCM 2012 R2 SP1
Once you have the Windows Server for SCCM 2012 R2 SP1 downloaded, you will need to install and configure it. First, insert the installation media into the server and start the installation process. Once the installation begins, you will be asked to accept the Microsoft Software License Terms. When you accept them, you will be asked to select the installation option you want, such as a basic installation or a custom installation. If you select the basic installation option, the setup wizard will install the operating system and configure the server for you.
If you choose the custom installation option, you will be asked to configure the server manually. Once the installation is complete, you will need to configure the server to run SCCM 2012 R2 SP
1. This includes setting up the Windows Firewall, configuring the Windows Update service, and setting up the SCCM site server. You will also need to configure certain roles and features on the server, such as the System Center 2012 Configuration Manager console, the System Center 2012 Data Protection Manager, the System Center 2012 Endpoint Protection, and the System Center 2012 Service Manager.
Once you have the server configured, you will need to install the SCCM 2012 R2 SP1 client. This will allow the server to communicate with the SCCM 2012 R2 SP1 site server and manage the clients that are running SCCM 2012 R2 SP
2. After the client is installed and configured, you will need to install the SCCM 2012 R2 SP1 console. This will allow you to manage the server, the clients, and the SCCM 2012 R2 SP1 site server from a single interface. Once the console is installed and configured, you will be ready to start managing your environment with SCCM 2012 R2 SP1.
Step 4: Installing and Configuring the SCCM 2012 R2 SP1 Site Server
Installing and configuring a System Center Configuration Manager (SCCM) 2012 R2 SP1 site server is a straightforward process that can be completed in a few simple steps. First, install the SCCM 2012 R2 SP1 server. This is done by downloading the appropriate version of the product from Microsoft’s website, and running the setup file. During the installation, installation options such as the installation language, site name, and site code should be provided. The installation process may take some time to complete, depending on the system’s specs. Once the installation is complete, a Configuration Manager console will open. The console is used to configure and manage the SCCM 2012 R2 SP1 server. First, the server needs to be configured to use a valid certificate.
This is done by selecting the “Certificates” option under the “Site Configuration” section of the console. Next, the server needs to be configured to communicate with the domain. This is done by selecting the “Active Directory Forest Discovery” option under the “Discovery Methods” section of the console. The next step is to configure the server to use a valid database. This is done by selecting the “Database” option under the “Site Configuration” section of the console. From here, the database server name, port, and authentication method can be specified. Additionally, the database size can be adjusted to suit the system’s needs.
Finally, the server needs to be configured to use a valid site boundary. This is done by selecting the “Boundaries” option under the “Site Configuration” section of the console. From here, the boundary type and boundary value can be specified. Once all of the above steps have been completed, the SCCM 2012 R2 SP1 server should be ready to go. The server can then be used to install, deploy, and manage software for the system, making it an invaluable tool for system administrators.
Step 5: Migrating Existing SCCM Data to the New SCCM 2012 R2 SP1 Site
When migrating existing SCCM data to a new SCCM 2012 R2 SP1 site, it is important to follow the correct process for a successful migration. Here are the steps that should be taken:
1. Back up the current SCCM site database. This can be done using the backup Site Server task from the Configuration Manager console.
2. Create the new SCCM 2012 R2 SP1 site. This can be done using the Configuration Manager Setup Wizard.
3. Once the new site has been created, import the backed up SCCM database to the new site. This can be done using the import data task from the Configuration Manager console.
4. Enable the SCCM Client Push feature. This will ensure that any new clients that are added to the system will receive the SCCM client installation package.
5. Configure the existing SCCM clients to use the new SCCM 2012 R2 SP1 site. This can be done by running the SetSCCMclient.exe program on each computer.
6. Perform a full SCCM inventory for all clients. This can be done by running the Scanstate.exe tool on each client.
7. Synchronize the SCCM 2012 R2 SP1 site with the existing SCCM site hierarchy. This can be done by running the Synchronize Hierarchy job from the Configuration Manager console.
8. Copy any custom reports or queries from the old SCCM site to the new SCCM 2012 R2 SP1 site.
9. Test the SCCM 2012 R2 SP1 site to ensure that everything is working properly. This can be done by running the Test SCCM Client Push Installation job from the Configuration Manager console. By following these steps, you should be able to successfully migrate existing SCCM data to the new SCCM 2012 R2 SP1 site.
Conclusion
The Step-by-Step SCCM 2012 R2 SP1 Upgrade Guide provides a comprehensive and detailed view of the upgrade process for an SCCM 2012 R2 SP1 installation. It is a useful resource for IT professionals who are planning to upgrade their SCCM installation to the newest version. The guide provides step-by-step instructions and screenshots to help ensure a successful upgrade. It is an invaluable resource for anyone looking to upgrade their SCCM installation.